
DIY Resin Bookmarks with Dried Flowers
For my late daughter’s birthday last week, I made resin bookmarks using flowers I had saved from her funeral with my husband and other children. It turned out to be the perfect activity to honor our little girl. We each designed our own, and everyone enjoyed doing so. The steps are super easy to follow, and as long as an adult is supervising, kid-friendly as well. We had a few flowers leftover, so I made another set of bookmarks (that I plan to gift to others) for a tutorial. This would be such a good craft to do with kids, as a family, or for a girls’ night of fun! Bookmarks also make great gifts or favors, and I believe their recipients would appreciate the personal touch.
What you need:

DRIED FLOWERS - I pressed and dried flowers myself. To do so, I placed fresh flowers between two layers of parchment paper and set a heavy object on top. Thick books work great for this. I then left them to dry like that for several weeks. But you can also order dried flowers online.
BOOKMARK RESIN MOLDS - I ordered these from Amazon. There are so many options. I picked these because I love the uneven edges on some and knew my husband would prefer the straight edges of the others. I also like the different size options.
EPOXY RESIN KIT - For the first set of bookmarks, I ordered this kit, and for the second set, I picked this one up from our nearest Walmart. I personally prefer the first kit. It came with more cups, and the cups were bigger. It also included a pair of gloves and an extra stick for stirring. (I was also doing another project with resin, so I split the resin between it and the bookmarks both times. I believe one 16 oz. resin kit will make about 12-15 bookmarks, depending on their size.)
PLASTIC CUPS & DISPOSABLE GLOVES - These may not be necessary depending on the epoxy resin kit that you get, but the cups that came with the second kit I got were much to small for mixing in them unless you are only using a small amount and it didn’t come with gloves.
GILDING FLAKES - These are optional, but I love the added aesthetic. This is the set I purchased.
SCISSORS & TWEEZERS - You may need scissors to cut the flowers to fit the molds or to get the appearance you desire. Tweezers can be used for arranging flowers and gilding flakes. (I didn’t realize until after the above picture was taken that the gilding flakes I ordered came with tweezers.)
TOOTHPICKS - When the resin is poured, the flowers or flakes may move slightly, so a toothpick can be used to reposition them if needed. You can also use it to pop any air bubbles that may occur.
BOOKMARK TASSELS - I love the color options this set provides. (The molds that I ordered came with strings, but I prefer the tassels.)
CRAFT PAPER & TAPE - I didn’t label this one in the picture, but I taped craft paper to the table top to protect the surface from resin drips.
Instructions:
Cover work surface with craft paper.
Arrange flowers in molds how you want them. Make sure they don’t stick up out of the mold, or they’ll also be sticking out of your bookmarks.
If you’re using gilding flakes, then place the flakes where you want them. I found it best to use tweezers for this step.
4. Wear gloves for this step and the next. Mix the epoxy resin according to its instructions. The kits I used required a 1:1 ratio. I measured parts A & B in separate cups. Then poured them into another cup together. Mix slowly to avoid excessive air bubbles. After mixing, I poured the solution into a fourth cup to ensure it got fully incorporated.
5. Once the resin is ready, carefully pour it into the molds. Be careful not to overfill it or the holes for the tassels may not go all the way through. If you do overfill them, use one of the sticks to rake off the excess.

6. Let cure according to the epoxy resin instructions. I left mine in the molds overnight before removing them. Then I placed them on the craft paper for the rest of the day to finish curing.
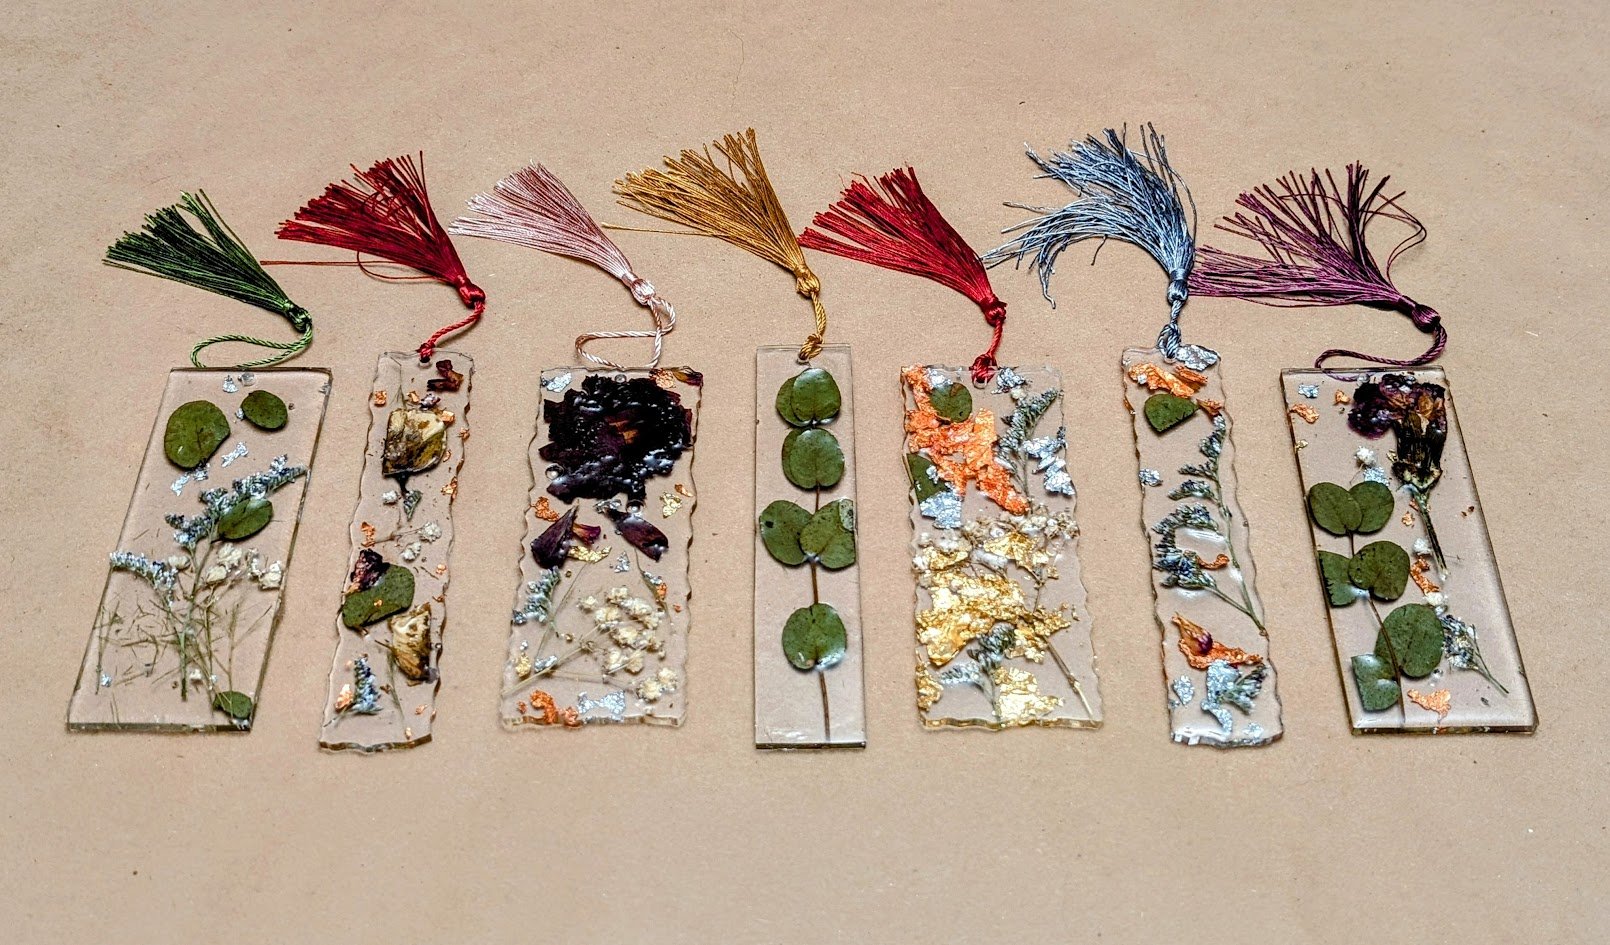
7. Add tassels. This last image is from the first batch of bookmarks I made with my husband and children. Unfortunately, three of them did get slightly overfilled, so we were unable to put tassels on them. My husband is going to drill the holes out this weekend though. As you might can see, a few of them also have tiny bits sticking out some, but I still think they turned out great.
8. Grab a book and get to reading!